Read more
计算机网络基本概念和知识
Z:\shaojiemike\Documents\文献\计算机网络目录下。这里先使用fjw的脚本。register.py,获得私钥和分配的ip1 | [Interface] |
main.sh修改包的3个字节。apt-get install nftables/etc/default/warp-helper文件填写对应的wg-conf里Endpoint。比如: ROUTING_ID=11,45,14
UPSTREAM=[2606:4700:d0::a29f:c001]:500
1
2
3
4
5
6
7
8
9
10
11
12
13
14
15
16
17
18
19
20
21
2. 最后开启路由表,Root权限运行` ip route add default dev warp proto static scope link table default`
## WARP on OpenWRT
* 目的:为了防止大量流量通过WARP,导致被官方封禁,所以只在OpenWRT上配置WARP分流github的流量。
* 实现思路:
* 运行python脚本,通过github的API获得所有的github域名ip,
* 使用iptables的warp_out表,将目的地址为github域名ip路由到WARP的虚拟网卡上。
### WARP Wireguard Establishment
```bash
python register.py #自动生成warp-op.conf,warp.conf和warp-helper
mv warp-helper /etc/default
# cat main.sh
# cat warp-op.conf
vim /etc/config/network #填写warp-op.conf内容,默认只转发172.16.0.0/24来测试连接
ifup warp #启动warp, 代替wg-quick up warp.conf
bash main.sh #启动防火墙实现报文头关键三字节修改
nft list ruleset #查看防火墙,是否配置成功
wg #查看warp状态,测试是否连接成果
这时还没创建warp_out路由表,所以还不能通过WARP出数据。
1 | #/etc/config/network |
然后WebUI点击apply 或者命令行运行ifconfig warp down && ifup
添加了WARP的网络出口后,路由器不在只是通过WAN出数据。防火墙需要更新:
wget --bind-address=WARP_ip来模拟10: from all lookup main suppress_prefixlength 11000: from all lookup warp_out,优先级10001 | root@tsjOp:~/warp# ip rule |
1 | cd ip_route |
对所有github域名的ip执行类似ip ro add 192.30.252.0/22 dev warp proto static table warp_out操作。
1 | mtr www.github.com |
修改/etc/rc.local
1 | # Put your custom commands here that should be executed once |
基于1.1.1.1 的安装windows版本直接白嫖
暂无
暂无
https://gist.github.com/iBug/3107fd4d5af6a4ea7bcea4a8090dcc7e
glados
127.0.0.1:7890上的数据+.*便等价于redir-host模式1 | # RESTful web API listening address |
假如服务器和笔记本在LAN下,笔记本的clash软件只需要打开LAN就可以给服务器代理了,是最简单方便的方式。
由于UGREEN NAS一直开机,作为代理节点很适合。
首先注意修改代理机场的文件config.yaml的0.0.0.0:9090,以便haishanh/yacd使用。
1 | mixed-port: 7890 |
dreamacro/clash^1haishanh/yacd下载可执行文件
1 | wget https://github.com/Dreamacro/clash/releases/download/v1.11.8/clash-linux-amd64-v1.11.8.gz |
Country.mmdb 文件,Country.mmdb 文件利用 GeoIP2 服务能识别互联网用户的地点位置,以供规则分流时使用。./clash 命令) 会自动下载(会下载至 /home/XXX/.config/clash 文件夹下)。自动下载可能会因网络原因较慢,可以访问该链接手动下载。根据订阅链接配置文件
1 | cd ~/.config/clash |
成功结果
1 | # shaojiemike @ node6 in ~/Download [10:22:54] C:130 |
http://clash.razord.top/#/proxies
输入
1 | Host: node6.swangeese.fun |
查看config.yaml,发现是空
1 | mixed-port: 7890 |
[^2]: Docker 安装 Clash 并对外提供代理服务
https://blog.iswiftai.com/posts/clash-linux/
https://einverne.github.io/post/2021/03/linux-use-clash.html
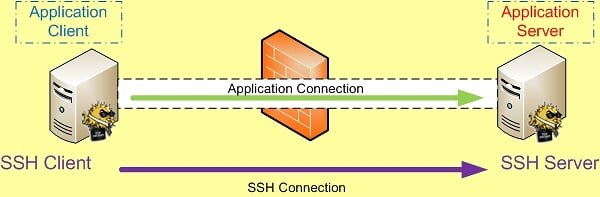
SSH 端口转发自然需要 SSH 连接,而SSH 连接是有方向的,从 SSH Client 到 SSH Server 。
而我们所要访问的应用也是有方向的,应用连接的方向也是从应用的 Client 端连接到应用的 Server 端。比如需要我们要访问Internet上的Web站点时,Http应用的方向就是从我们自己这台主机(Client)到远处的Web Server。
如果SSH连接和应用的连接这两个连接的方向一致,那我们就说它是本地转发。
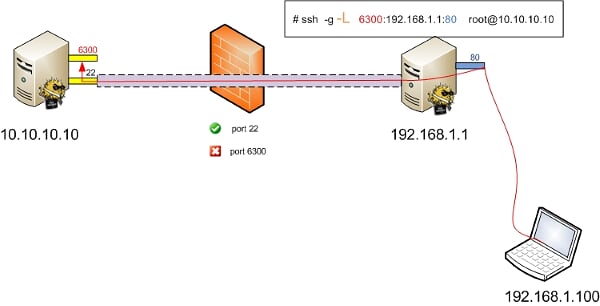
1 | ssh -L [bind_address:]port:host:hostport <SSH hostname> |
本地转发在本地这台机器上监听一个端口,然后所有访问这个端口的数据都会通过ssh 隧道传输到远端的对应端口上。命令中的 host 和 <SSH hostname> 可以是不同的主机。
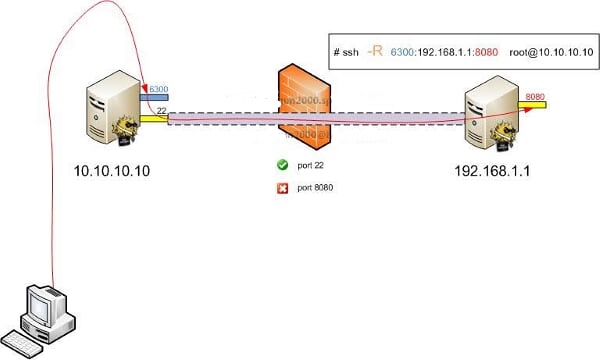
如果SSH连接和应用的连接这两个连接的方向不同,那我们就说它是远程转发。
1 | ssh -R [bind_address:]port:host:hostport <SSH hostname> |
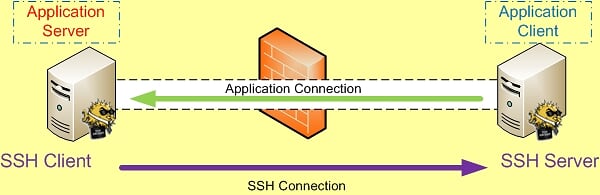
远程转发与本地转发正好相反,打开ssh隧道以后,在远端服务器监听一个端口,所有访问远端服务器指定端口都会通过隧道传输到本地的对应端口上,下面是例子。
1 | -C:压缩数据传输。 |
1 | -f Requests ssh to go to background just before command execution. This is useful if ssh is going to ask for passwords or |
将发往本机的80端口访问转发到174.139.9.66的8080端口
1 | ssh -C -f -N -g -L 80:174.139.9.66:8080 [email protected] |
将发往174.139.9.66的8080访问转发到本机的80端口
1 | ssh -C -f -N -g -R 80:174.139.9.66:8080 [email protected] |
使用远程管理服务器上的MySQL
1 | ssh -C -f -N -g -L 80:174.139.9.66:8080 [email protected] |
一次同时映射多个端口
1 | ssh -L 8888:www.host.com:80 -L 110:mail.host.com:110 -L 25:mail.host.com:25 user@host -N |
.ssh/config修改
1 | Host * |
更改ssh服务器的配置文件/etc/ssh/sshd_config
1 | ClientAliveInterval 60 |
原理同上
重启ssh服务以使配置生效
1 | systemctl restart sshd |
我们可以把这个映射的端口绑定在0.0.0.0的接口上,方法是加上参数-b 0.0.0.0。
同时修改SSH服务器端 /etc/sshd_config中 GatewayPorts no为 GatewayPorts yes来打开它。
1 | Host * |
1 | ssh -L 6006:127.0.0.1:6006 -N -f -l acsacom snode6.swangeese.fun |
本地网络代理到服务器
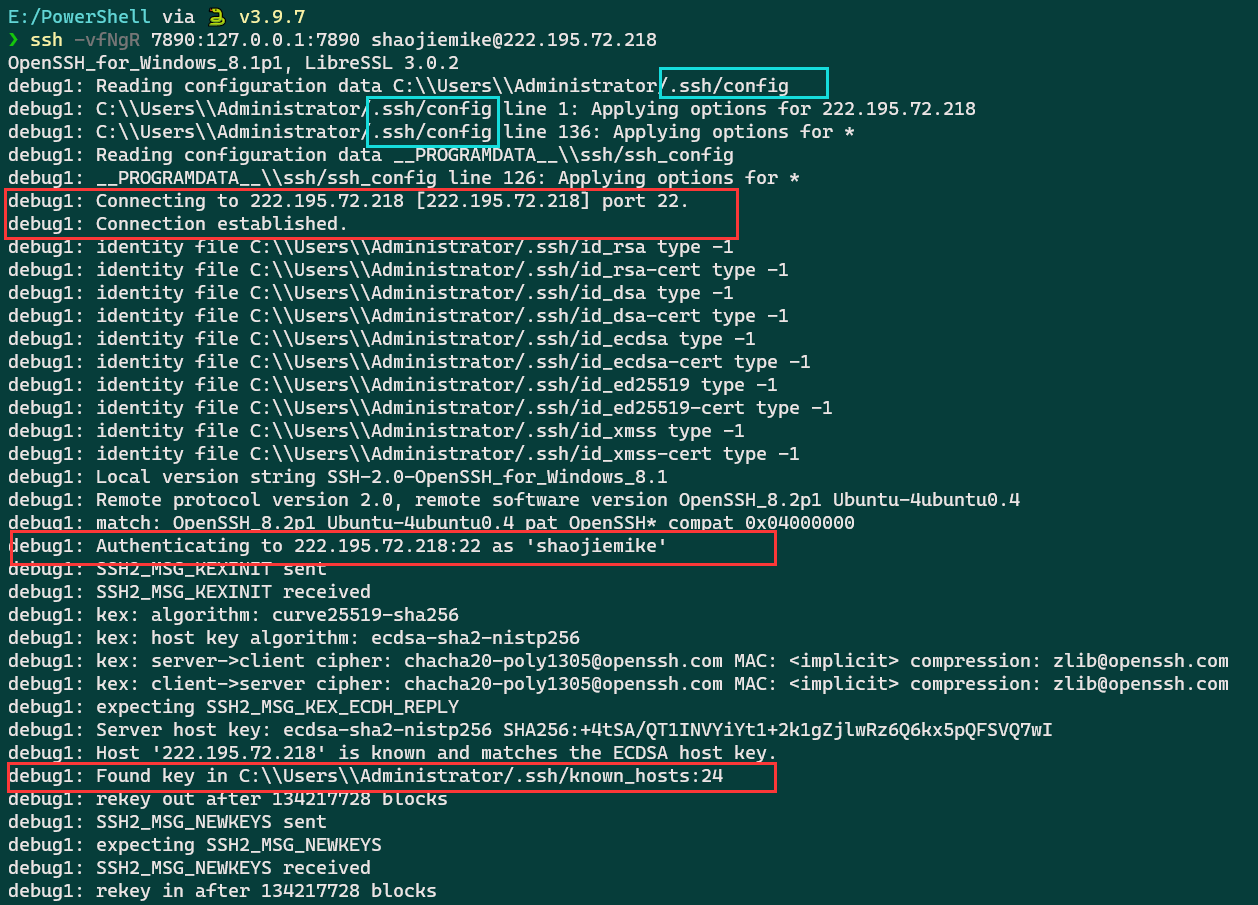
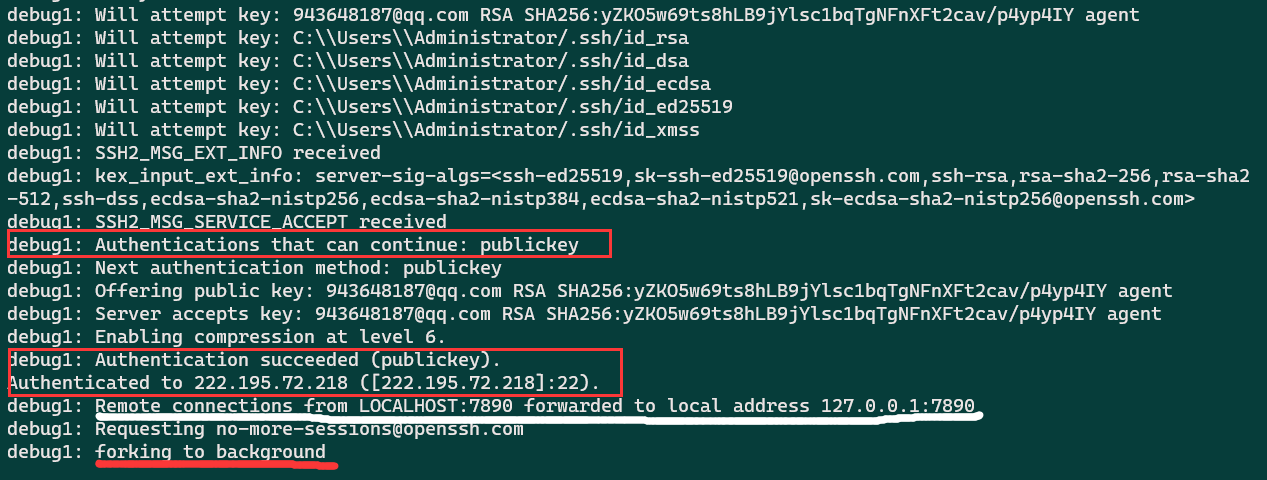
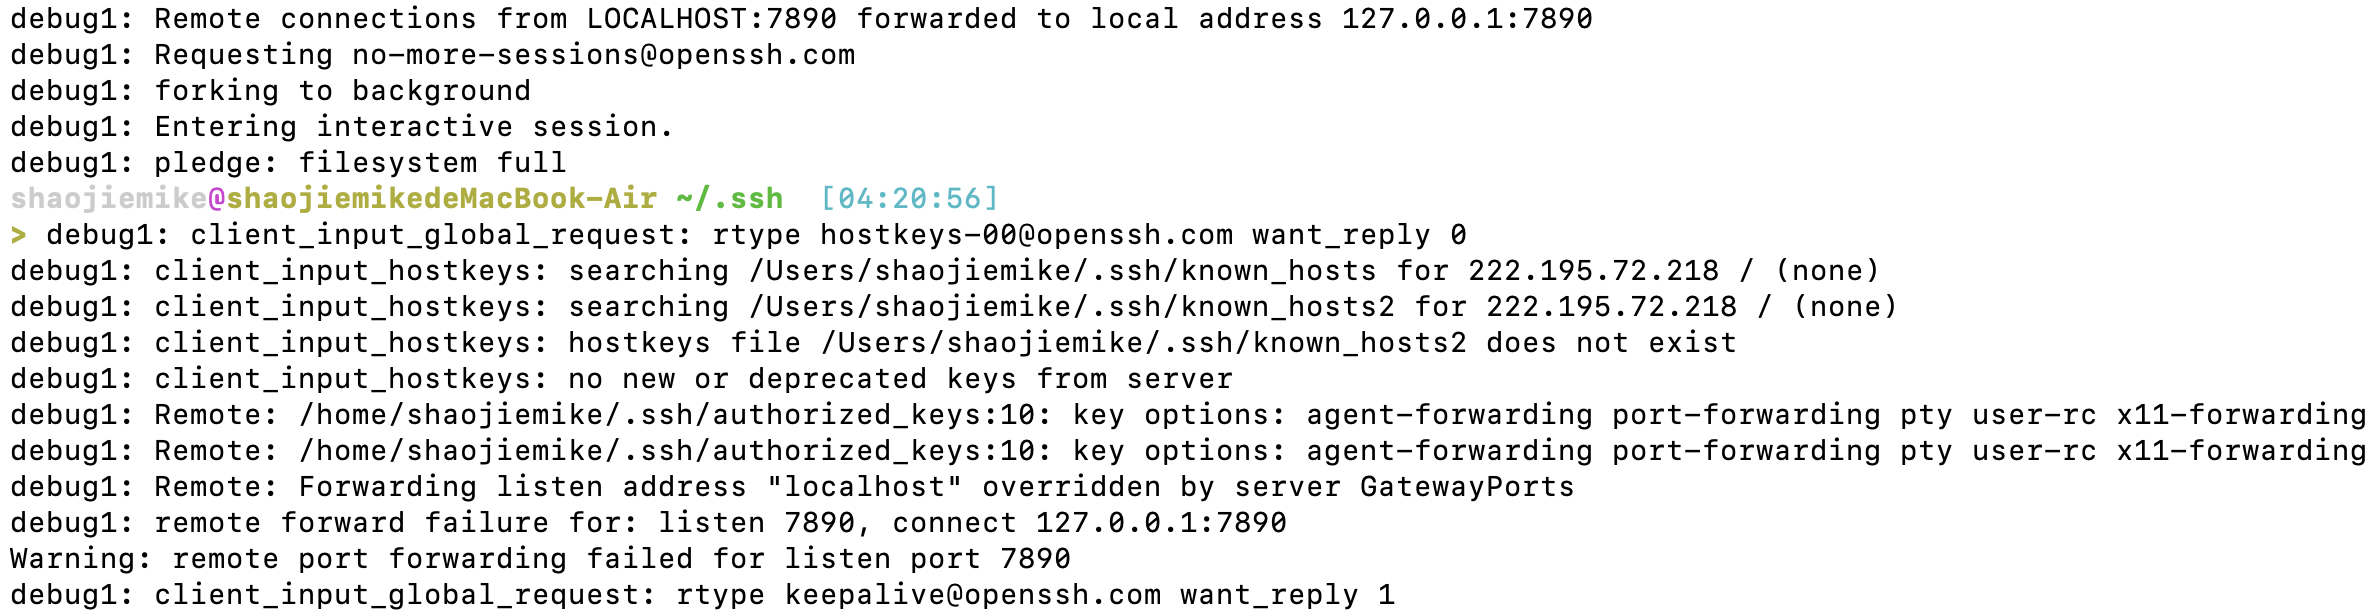
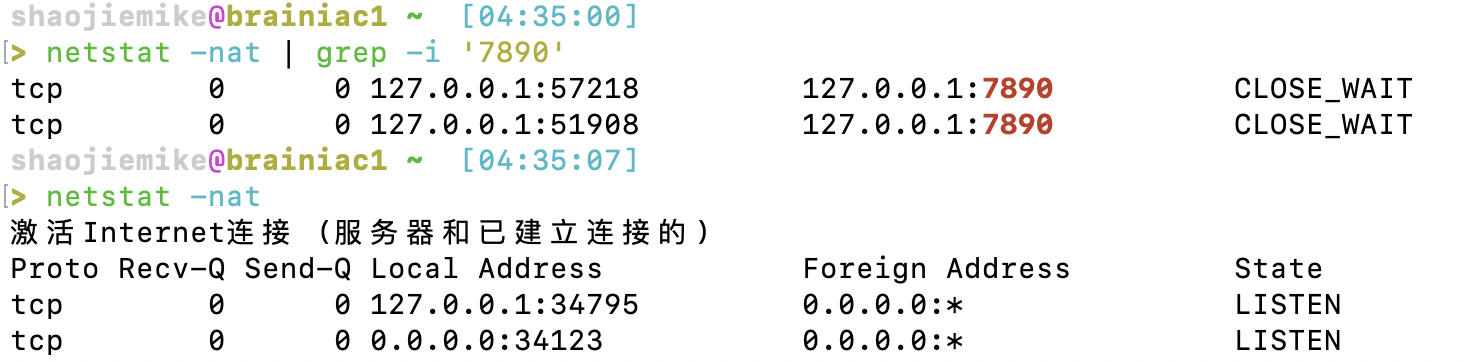
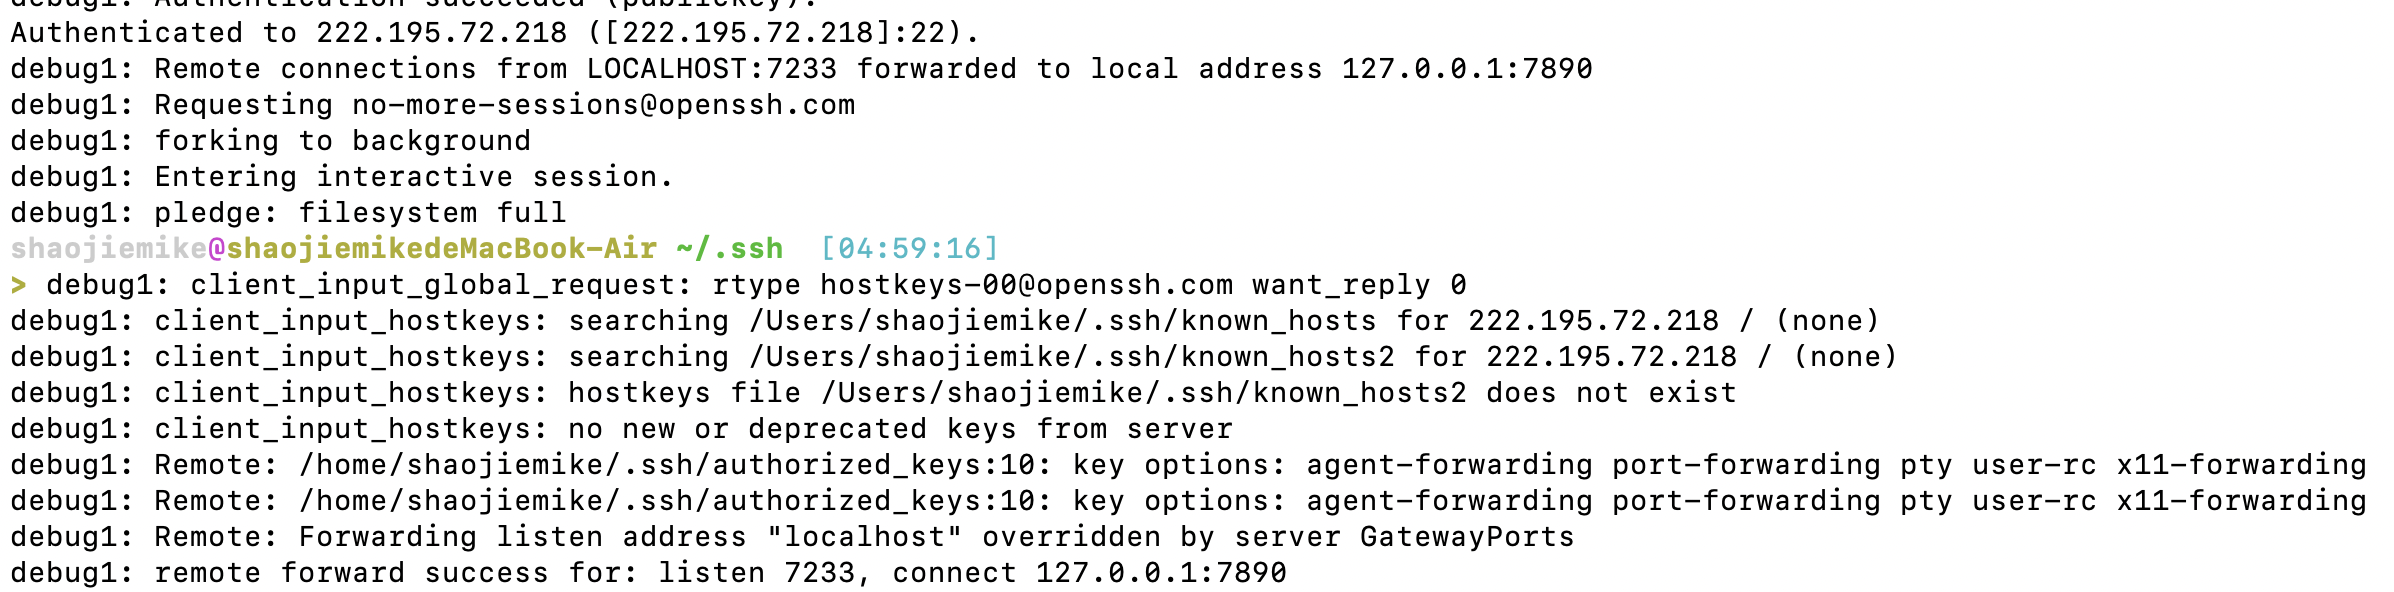
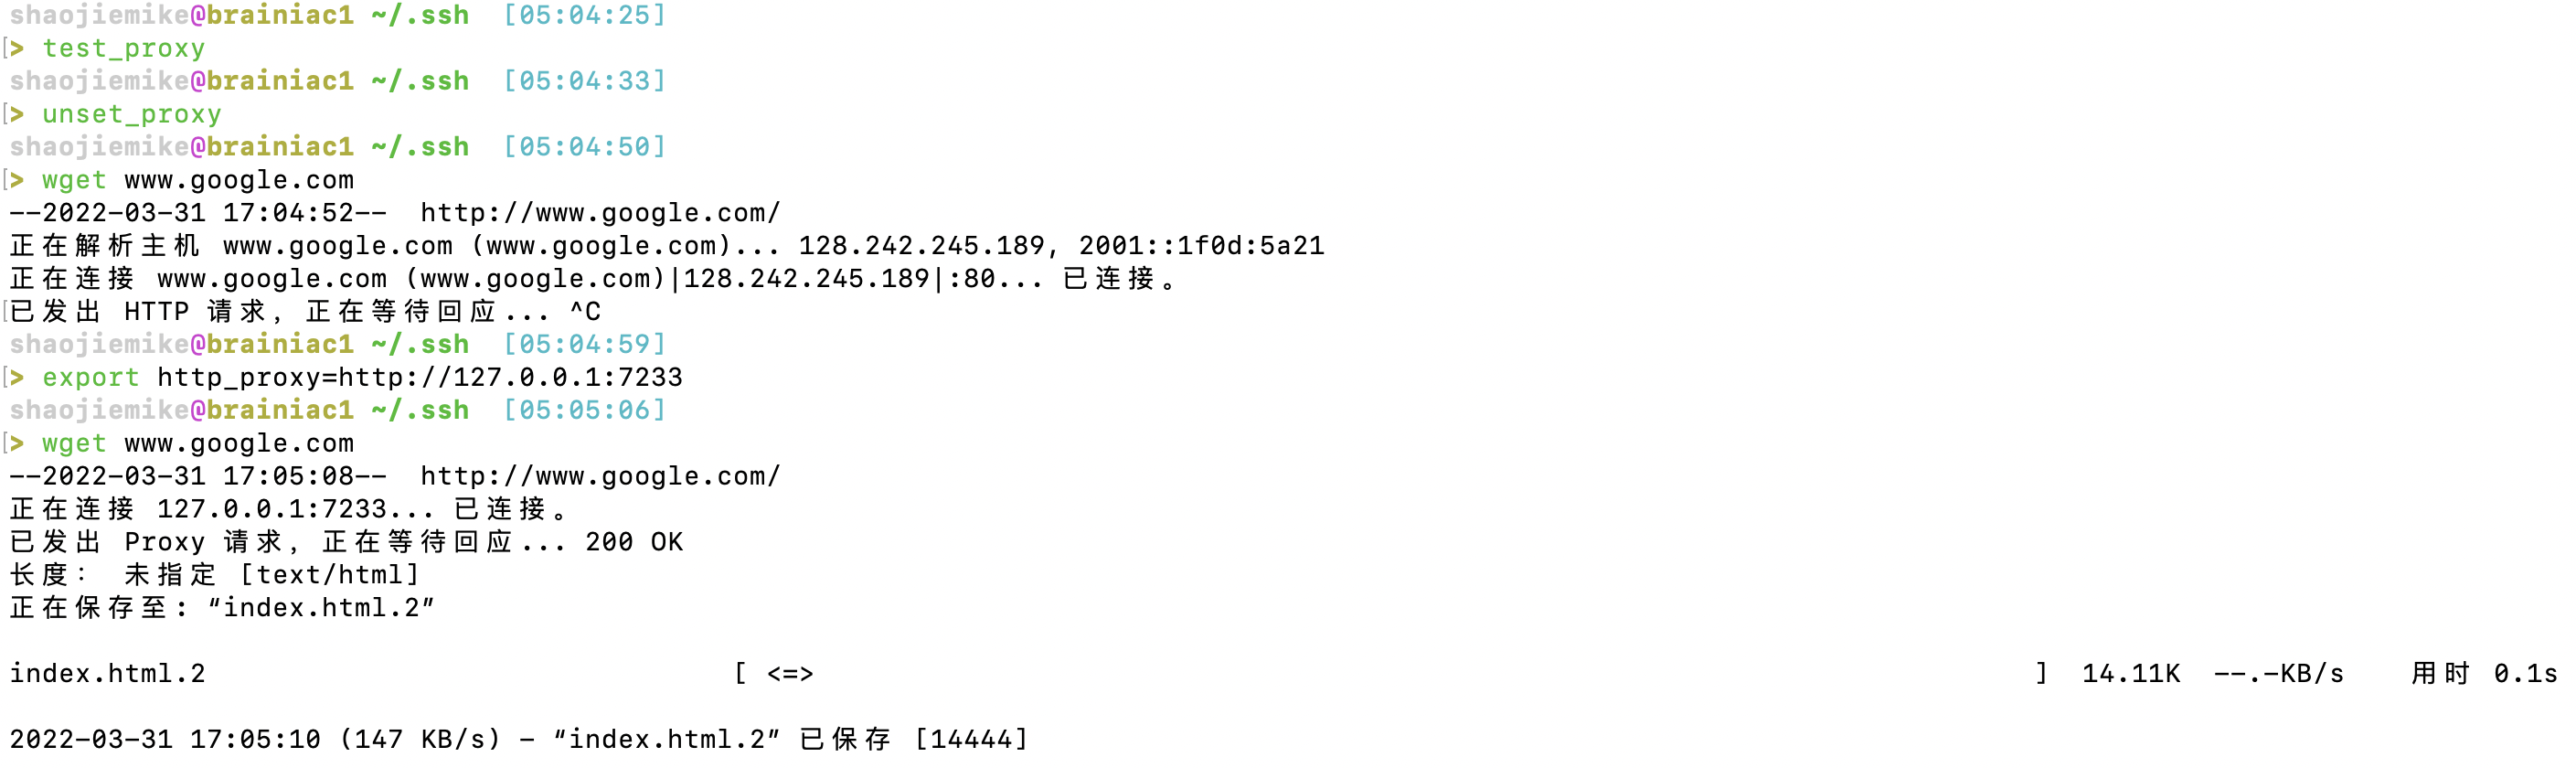
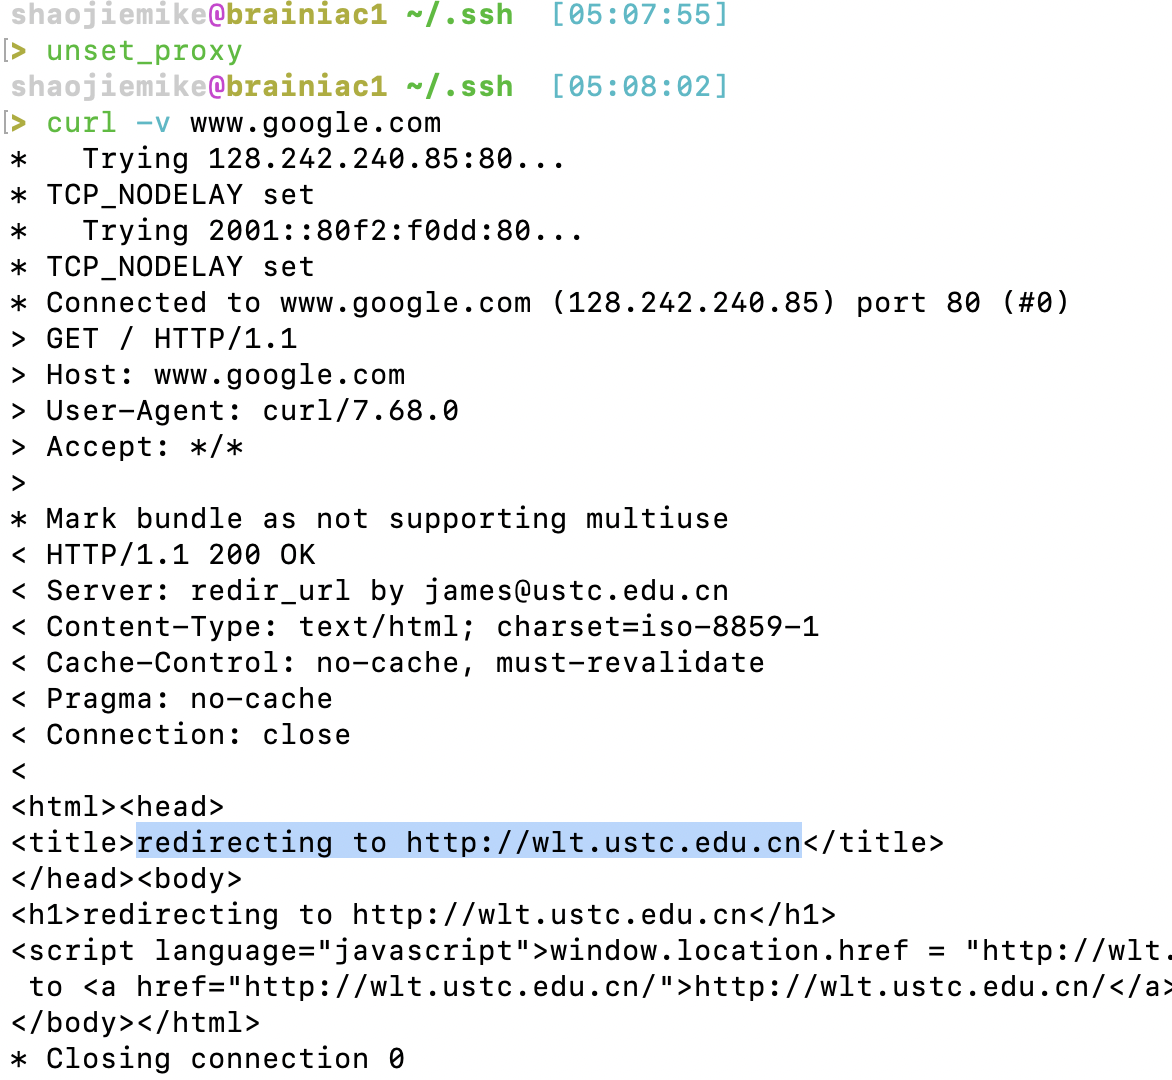
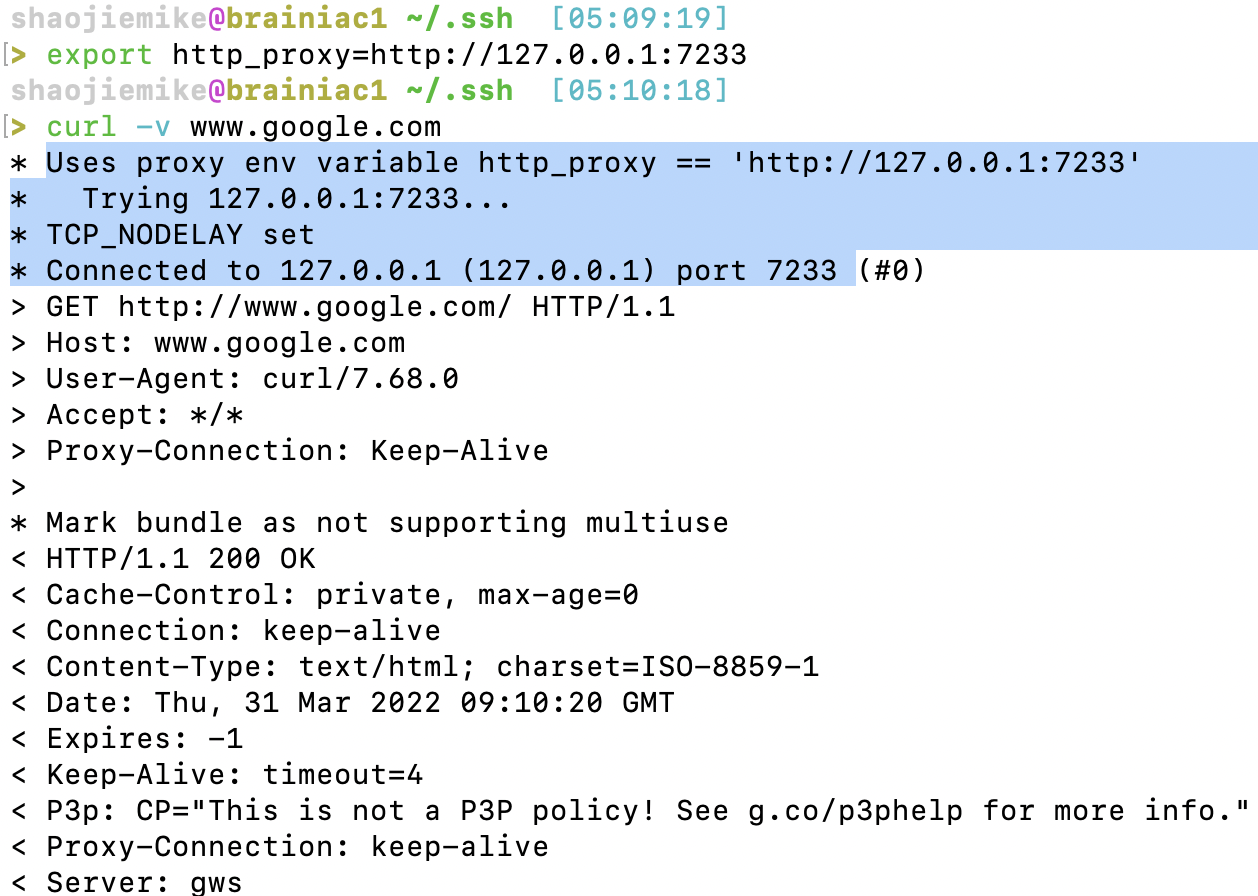
1 | ssh -fNgR 7333:127.0.0.1:7890 [email protected] |
7333数字不要太小,以免冲突。7890是本地clash端口,80也可以。1 | #YJH proxy |