Read more
计算机网络基本概念和知识
ssh config & X11 & jump-machine
1 | Host node5 |
1 | sudo journalctl -u ssh --since "yesterday" |less |
windows use mobaxterm, mac use xquartz + iterms
1 | ssh -Y [email protected] |
在管理外网服务器时,出于安全等因素的考虑,我们一般不会把所有服务器都设置成可ssh直连,而是会从中挑选出一台机器作为跳板机,当我们想要连接外网服务器时,我们要先通过ssh登录到跳板机,再从跳板机登录到目标服务器。
1 | $ eval $(ssh-agent) |
1 | ssh -A [email protected] |
或者直接
1 | ssh -J [email protected] [email protected] |
这条命令将会首先连接到 [email protected] 的跳板机,然后再通过跳板机连接到 [email protected] 的目标服务器。
1 | scp -J [email protected] [email protected]:/path/to/source/file /path/to/destination/file |
这个命令将会通过 [email protected] 的跳板机从源文件 /path/to/source/file 复制数据到 [email protected] 的目标文件 /path/to/destination/file。
1 | Host <name> |
check is ssh use direct connect not use jump host
google check ssh gui x11 use jump host
https://www.ibm.com/support/pages/how-forward-x11-client-through-jump-host-back-pc-x-emulator
/etc/ssh/sshd_configxauthDISPLAY and XAUTHORITY will automatically be set to their proper values.DISPLAY is not set, it means ssh is not forwarding the X11 connection.ForwardX11 yes in ~/.ssh/configX11UseLocalhost yesvlab 能正常登录的情况下ssh -i D:\\PowerShell\\vlab-vm7096.pem [email protected]
有两种设置ssh config设置方法
1 | Host jumpSnode6Ipv4W |
Workers & Pages 下 create an application, choose the Pages tab and follow the git connection tutorial.mkdocs build 实现部署。https://kirrito-k423.github.io/
替换shaojiemike.pages.dev 变成自己的域名 shaojiemike.top: cloudflare pages 下直接提供Custom domains 的解析 CNAME www shaojiemike.pages.dev
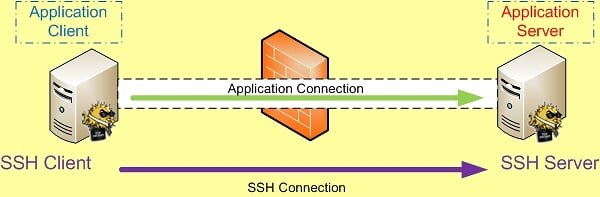
SSH 端口转发自然需要 SSH 连接,而SSH 连接是有方向的,从 SSH Client 到 SSH Server 。
而我们所要访问的应用也是有方向的,应用连接的方向也是从应用的 Client 端连接到应用的 Server 端。比如需要我们要访问Internet上的Web站点时,Http应用的方向就是从我们自己这台主机(Client)到远处的Web Server。
如果SSH连接和应用的连接这两个连接的方向一致,那我们就说它是本地转发。
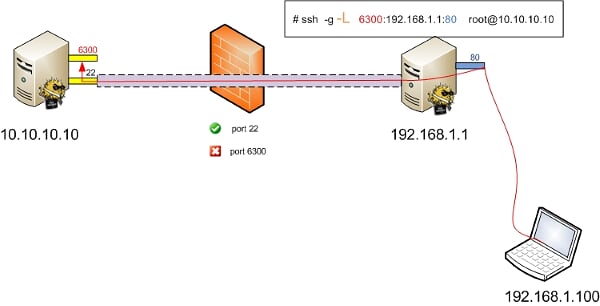
1 | ssh -L [bind_address:]port:host:hostport <SSH hostname> |
本地转发在本地这台机器上监听一个端口,然后所有访问这个端口的数据都会通过ssh 隧道传输到远端的对应端口上。命令中的 host 和 <SSH hostname> 可以是不同的主机。
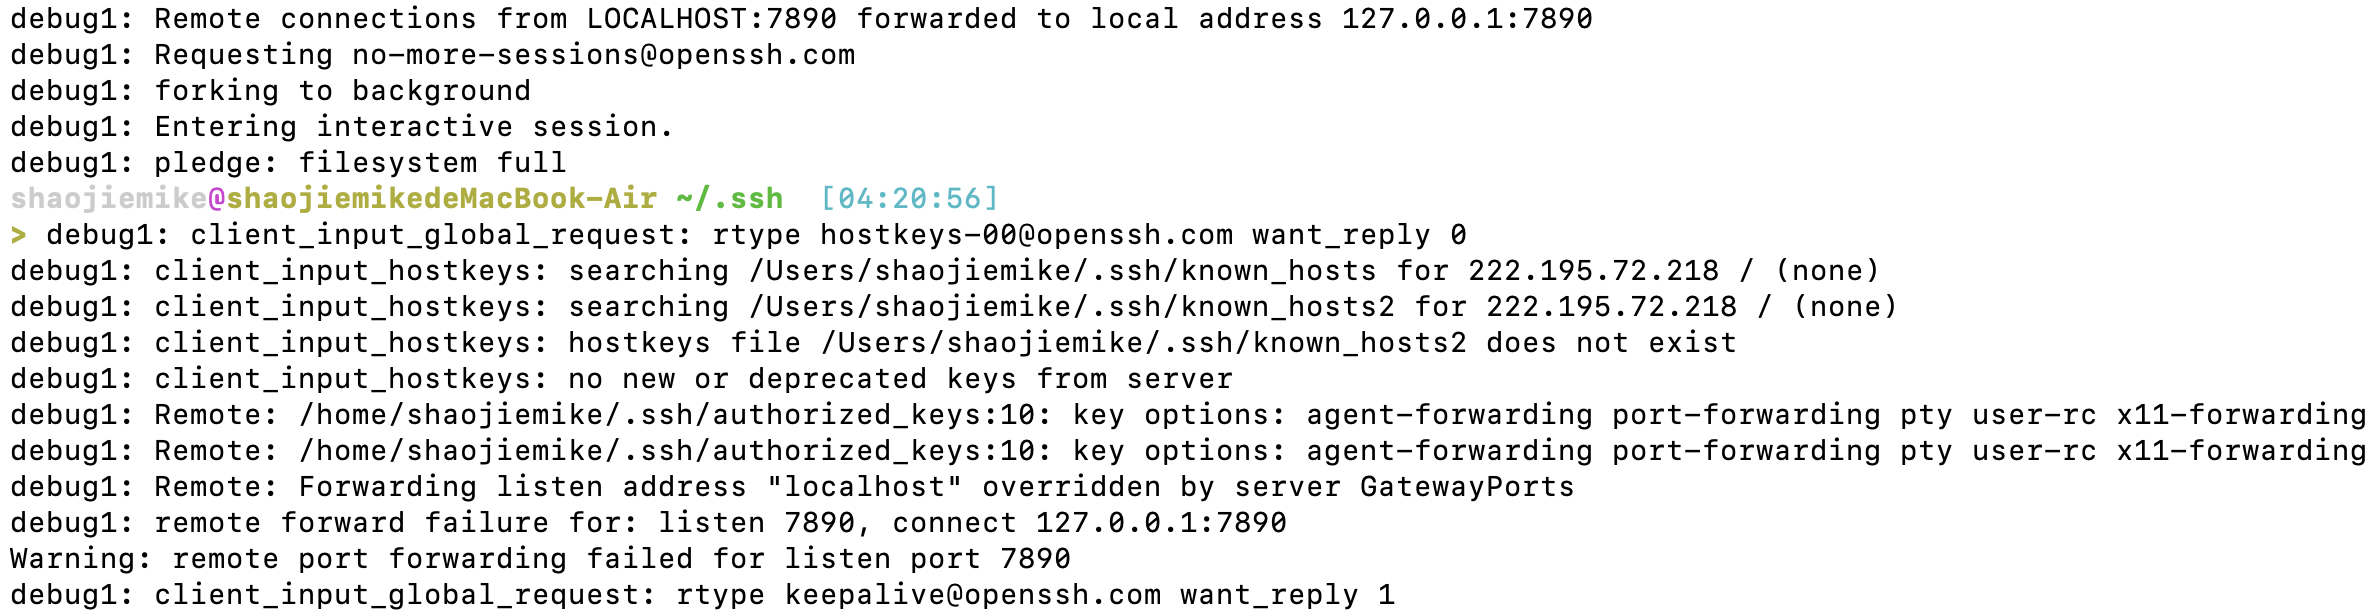
如果SSH连接和应用的连接这两个连接的方向不同,那我们就说它是远程转发。
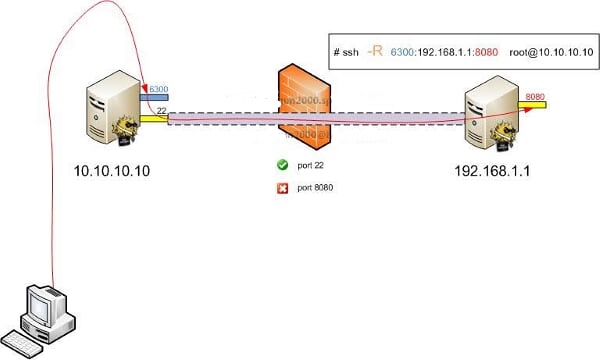
1 | ssh -R [bind_address:]port:host:hostport <SSH hostname> |
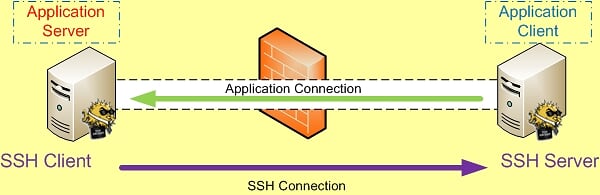
远程转发与本地转发正好相反,打开ssh隧道以后,在远端服务器监听一个端口,所有访问远端服务器指定端口都会通过隧道传输到本地的对应端口上,下面是例子。
1 | -C:压缩数据传输。 |
1 | -f Requests ssh to go to background just before command execution. This is useful if ssh is going to ask for passwords or |
将发往本机的80端口访问转发到174.139.9.66的8080端口
1 | ssh -C -f -N -g -L 80:174.139.9.66:8080 [email protected] |
将发往174.139.9.66的8080访问转发到本机的80端口
1 | ssh -C -f -N -g -R 80:174.139.9.66:8080 [email protected] |
使用远程管理服务器上的MySQL
1 | ssh -C -f -N -g -L 80:174.139.9.66:8080 [email protected] |
一次同时映射多个端口
1 | ssh -L 8888:www.host.com:80 -L 110:mail.host.com:110 -L 25:mail.host.com:25 user@host -N |
.ssh/config修改
1 | Host * |
更改ssh服务器的配置文件/etc/ssh/sshd_config
1 | ClientAliveInterval 60 |
原理同上
重启ssh服务以使配置生效
1 | systemctl restart sshd |
我们可以把这个映射的端口绑定在0.0.0.0的接口上,方法是加上参数-b 0.0.0.0。
同时修改SSH服务器端 /etc/sshd_config中 GatewayPorts no为 GatewayPorts yes来打开它。
1 | Host * |
1 | ssh -L 6006:127.0.0.1:6006 -N -f -l acsacom snode6.swangeese.fun |
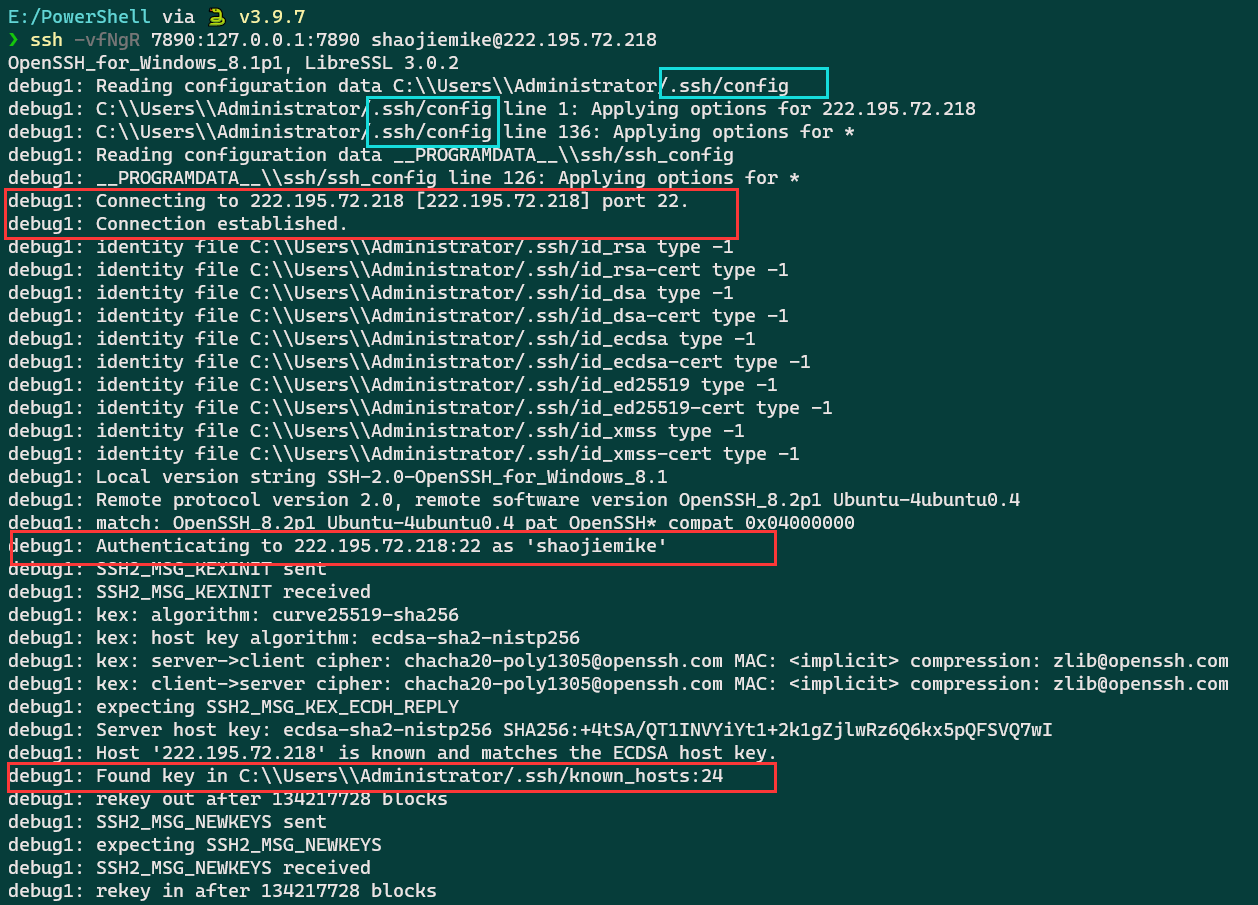
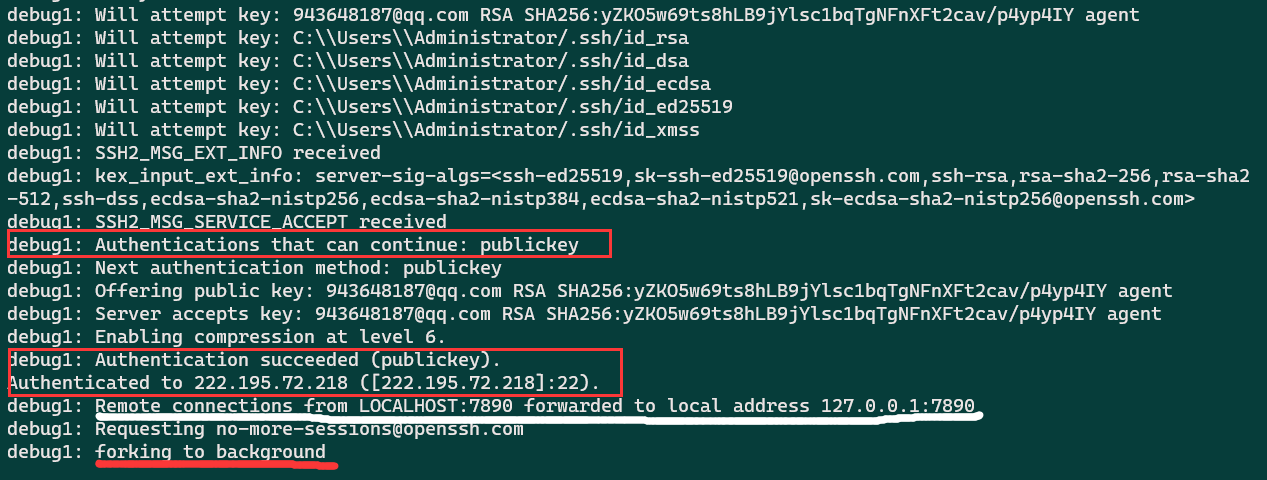
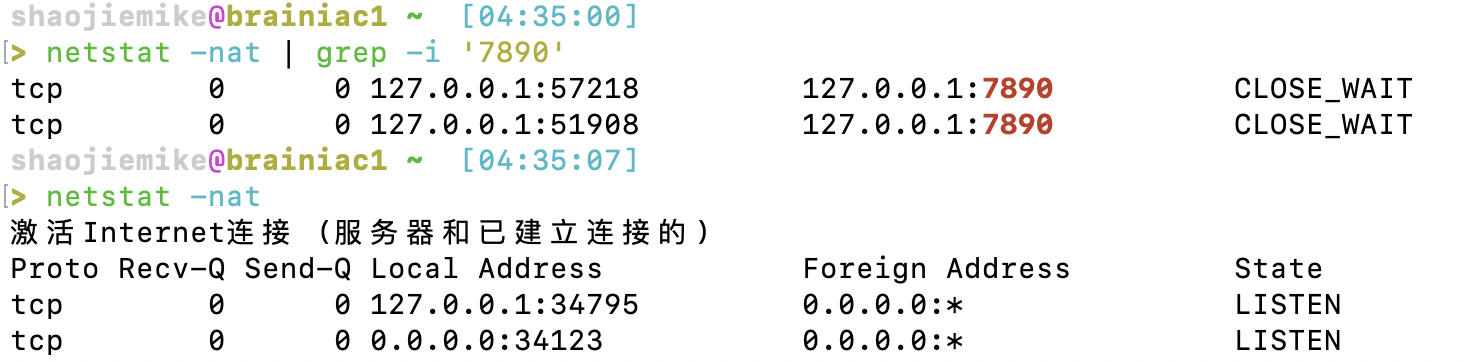
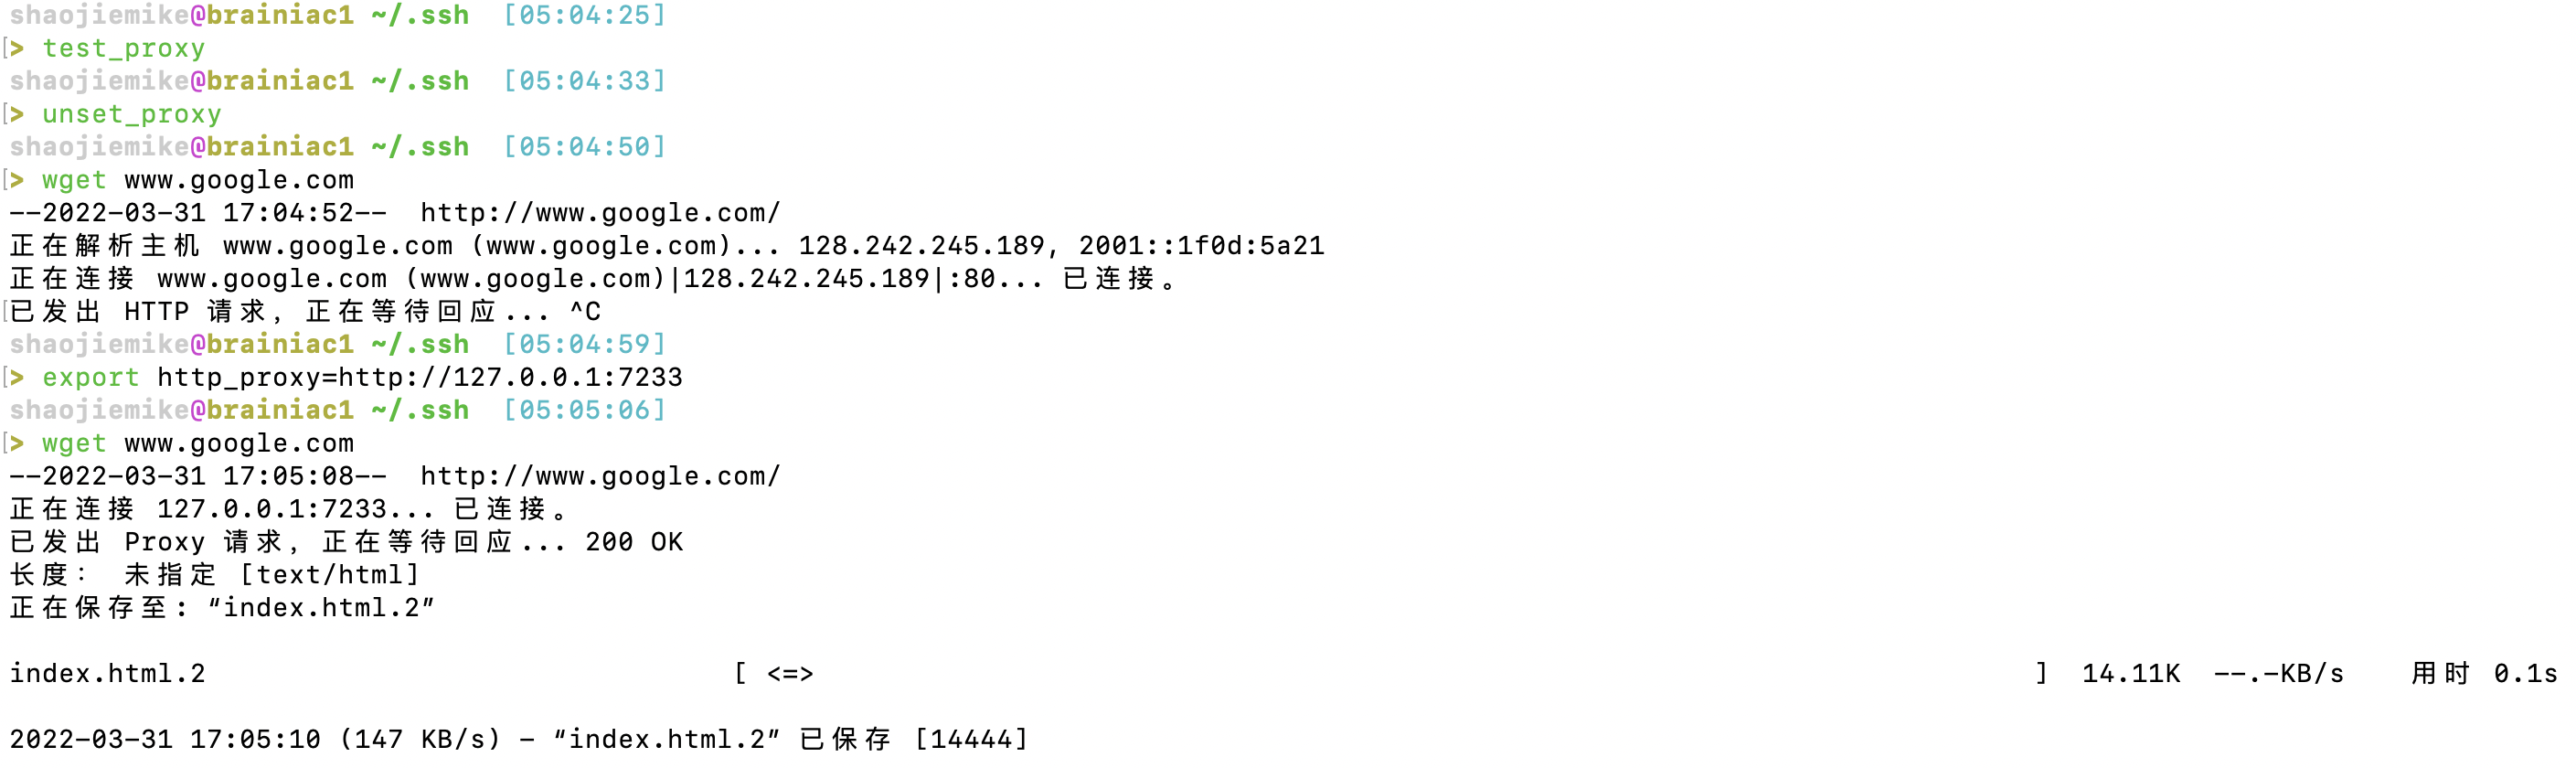
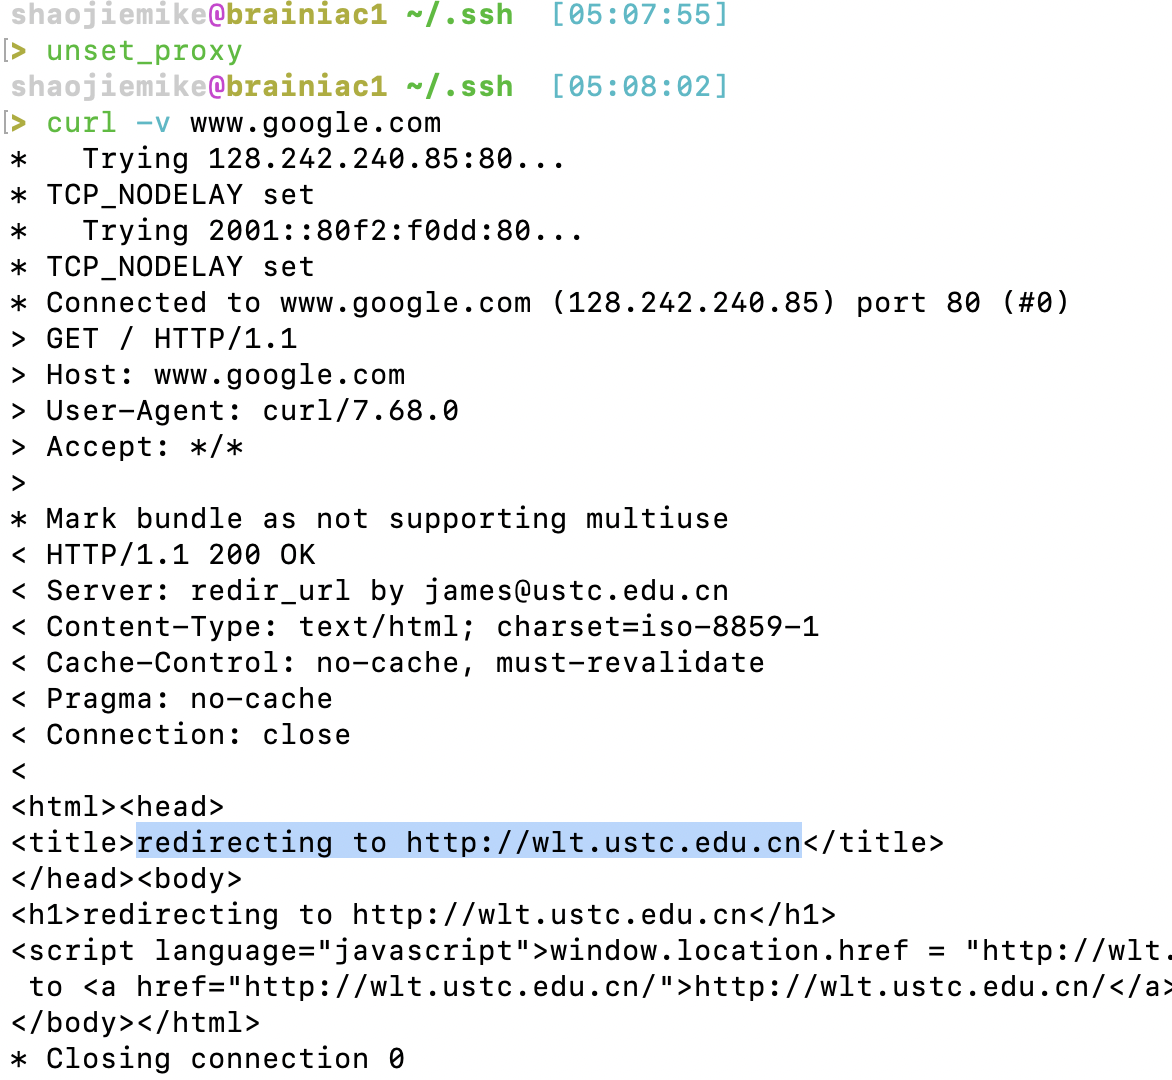
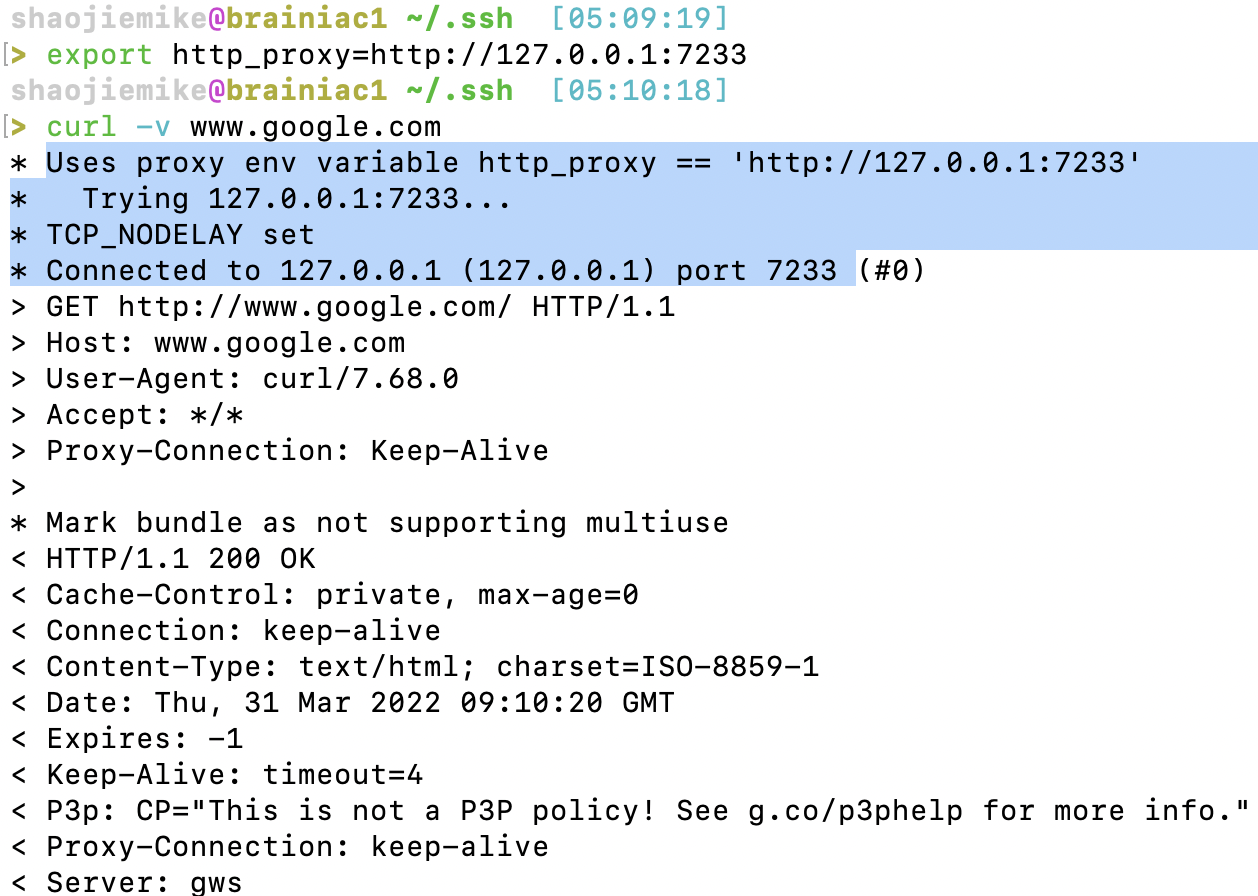
本地网络代理到服务器
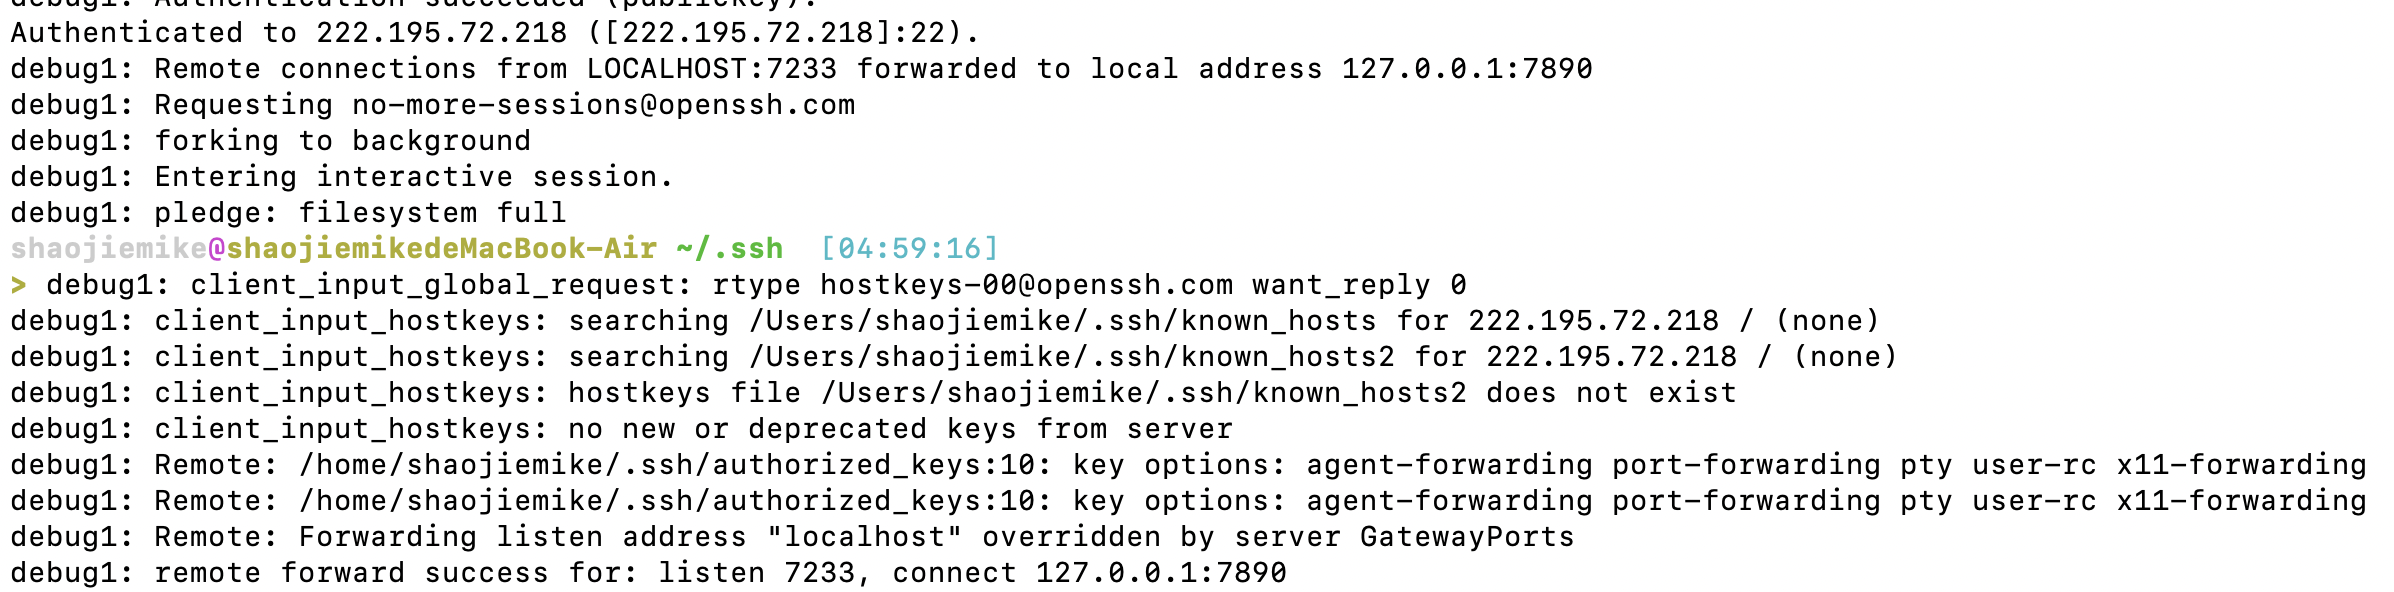
1 | ssh -fNgR 7333:127.0.0.1:7890 [email protected] |
7333数字不要太小,以免冲突。7890是本地clash端口,80也可以。1 | #YJH proxy |